

记录 CloudflareTunnel 内网穿透操作。
Proxmox VE
版本:8.1.4
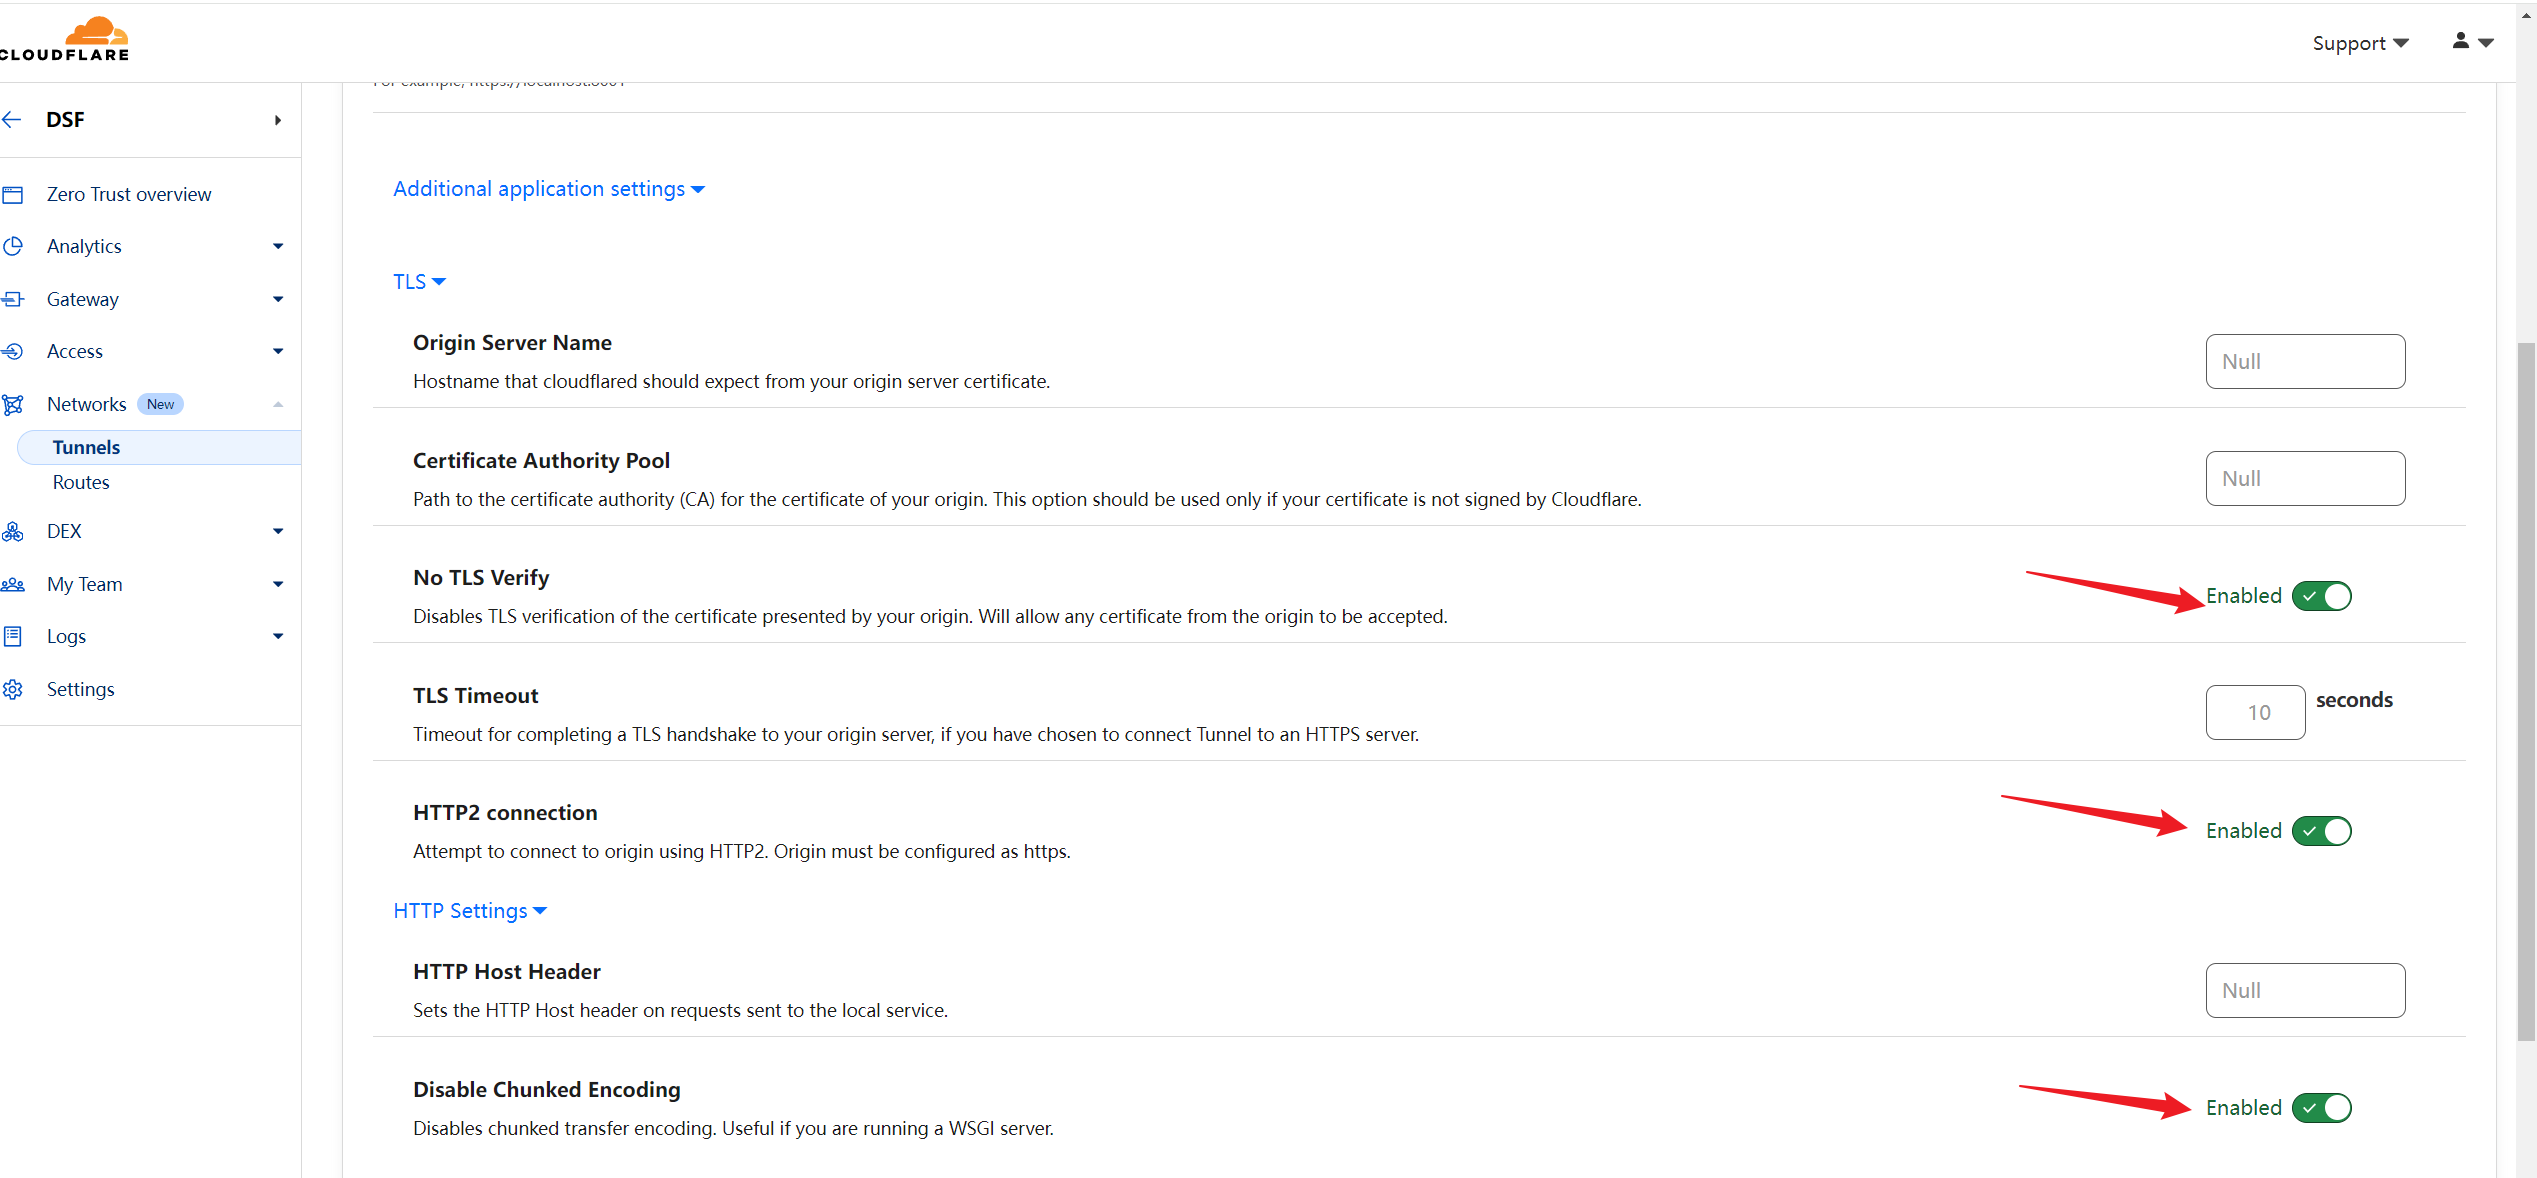
使用 https,需要在 Public Hostname Page 的 Additional application settings 开启以下 3 个选项。
1 | No TLS Verify |
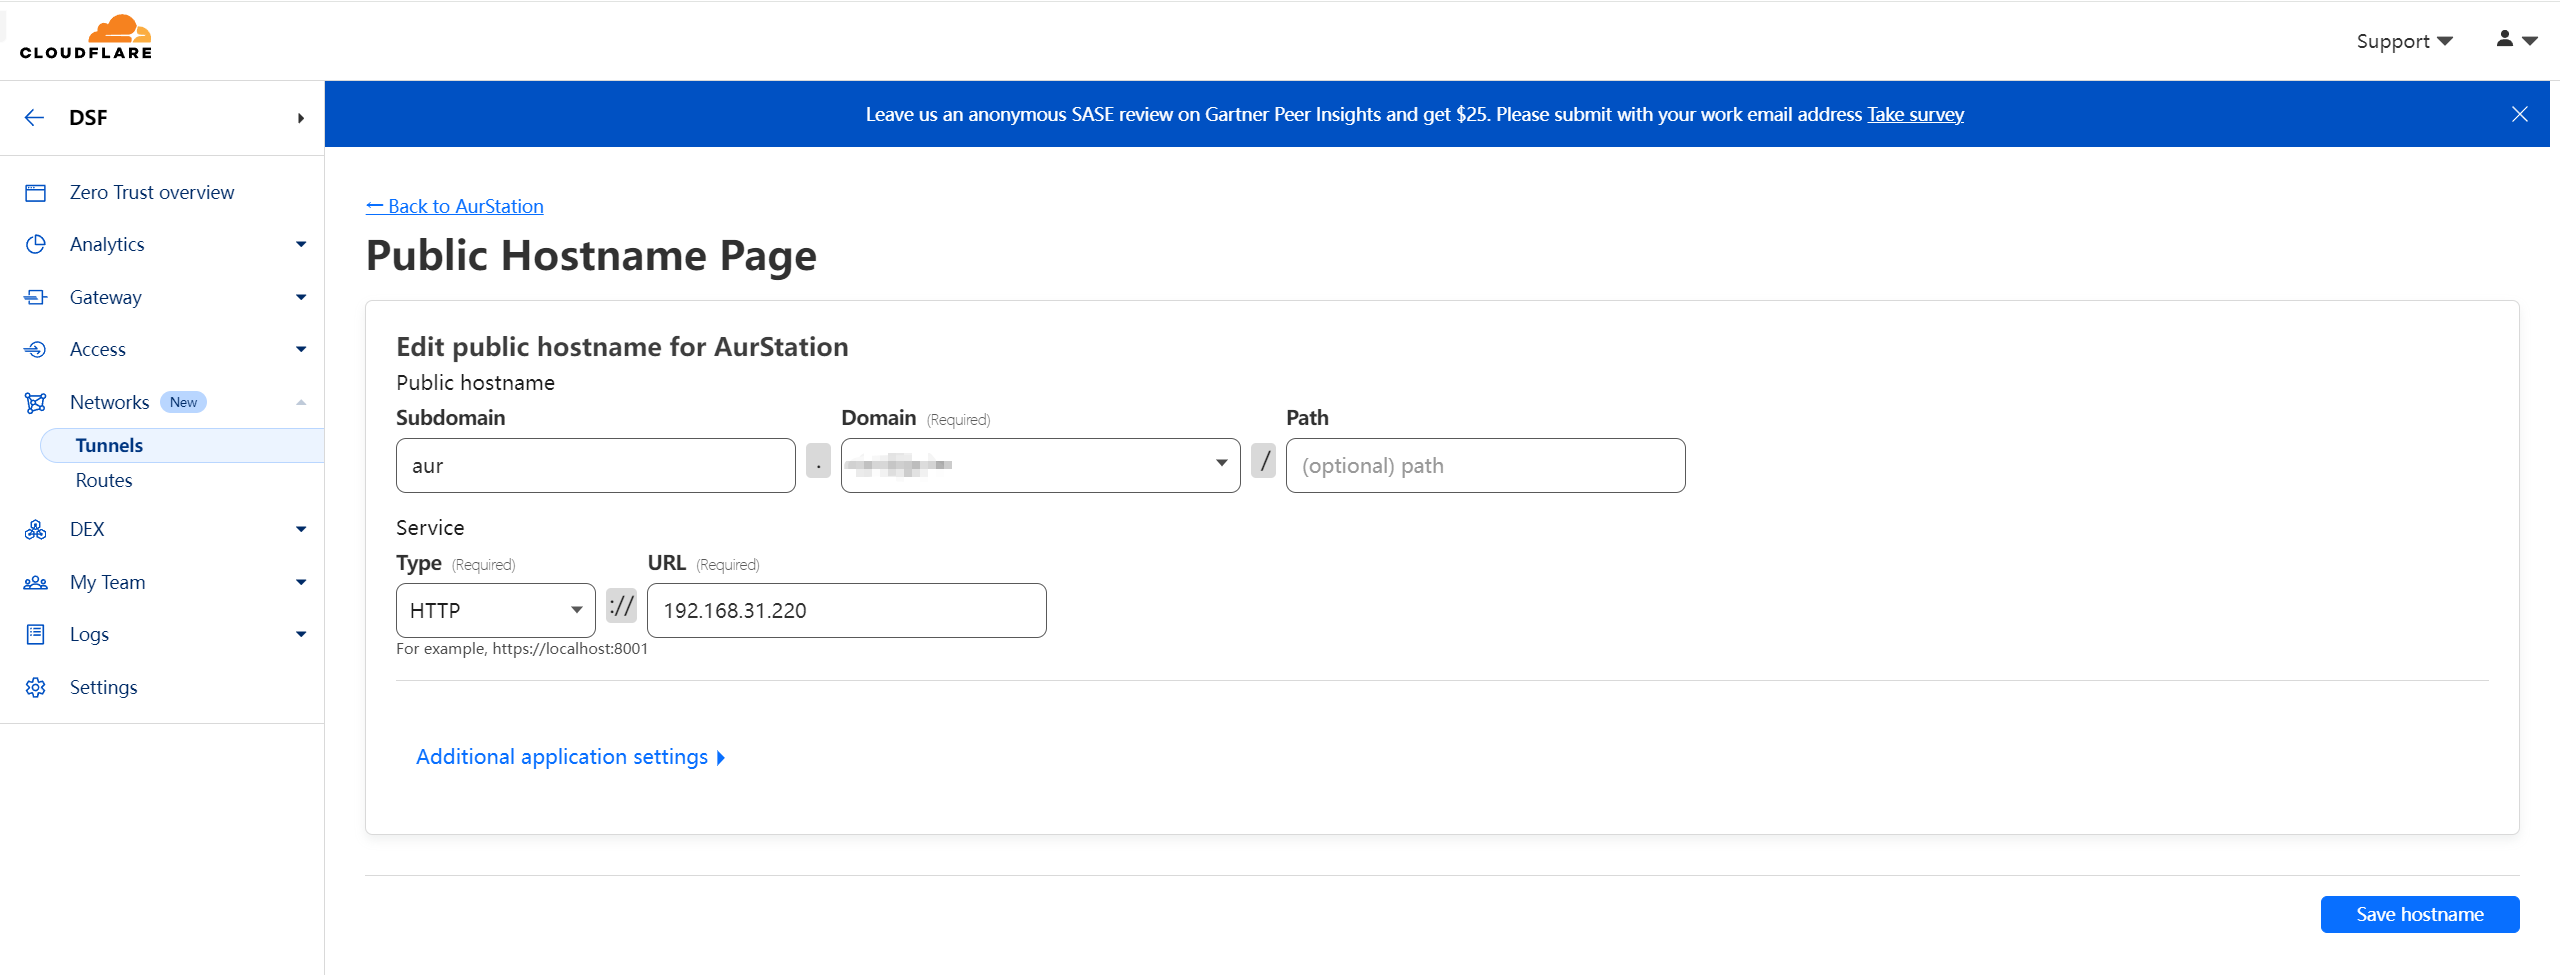
Unraid
版本:6.12.6
使用 http 协议,配置如图:
SSH
设置
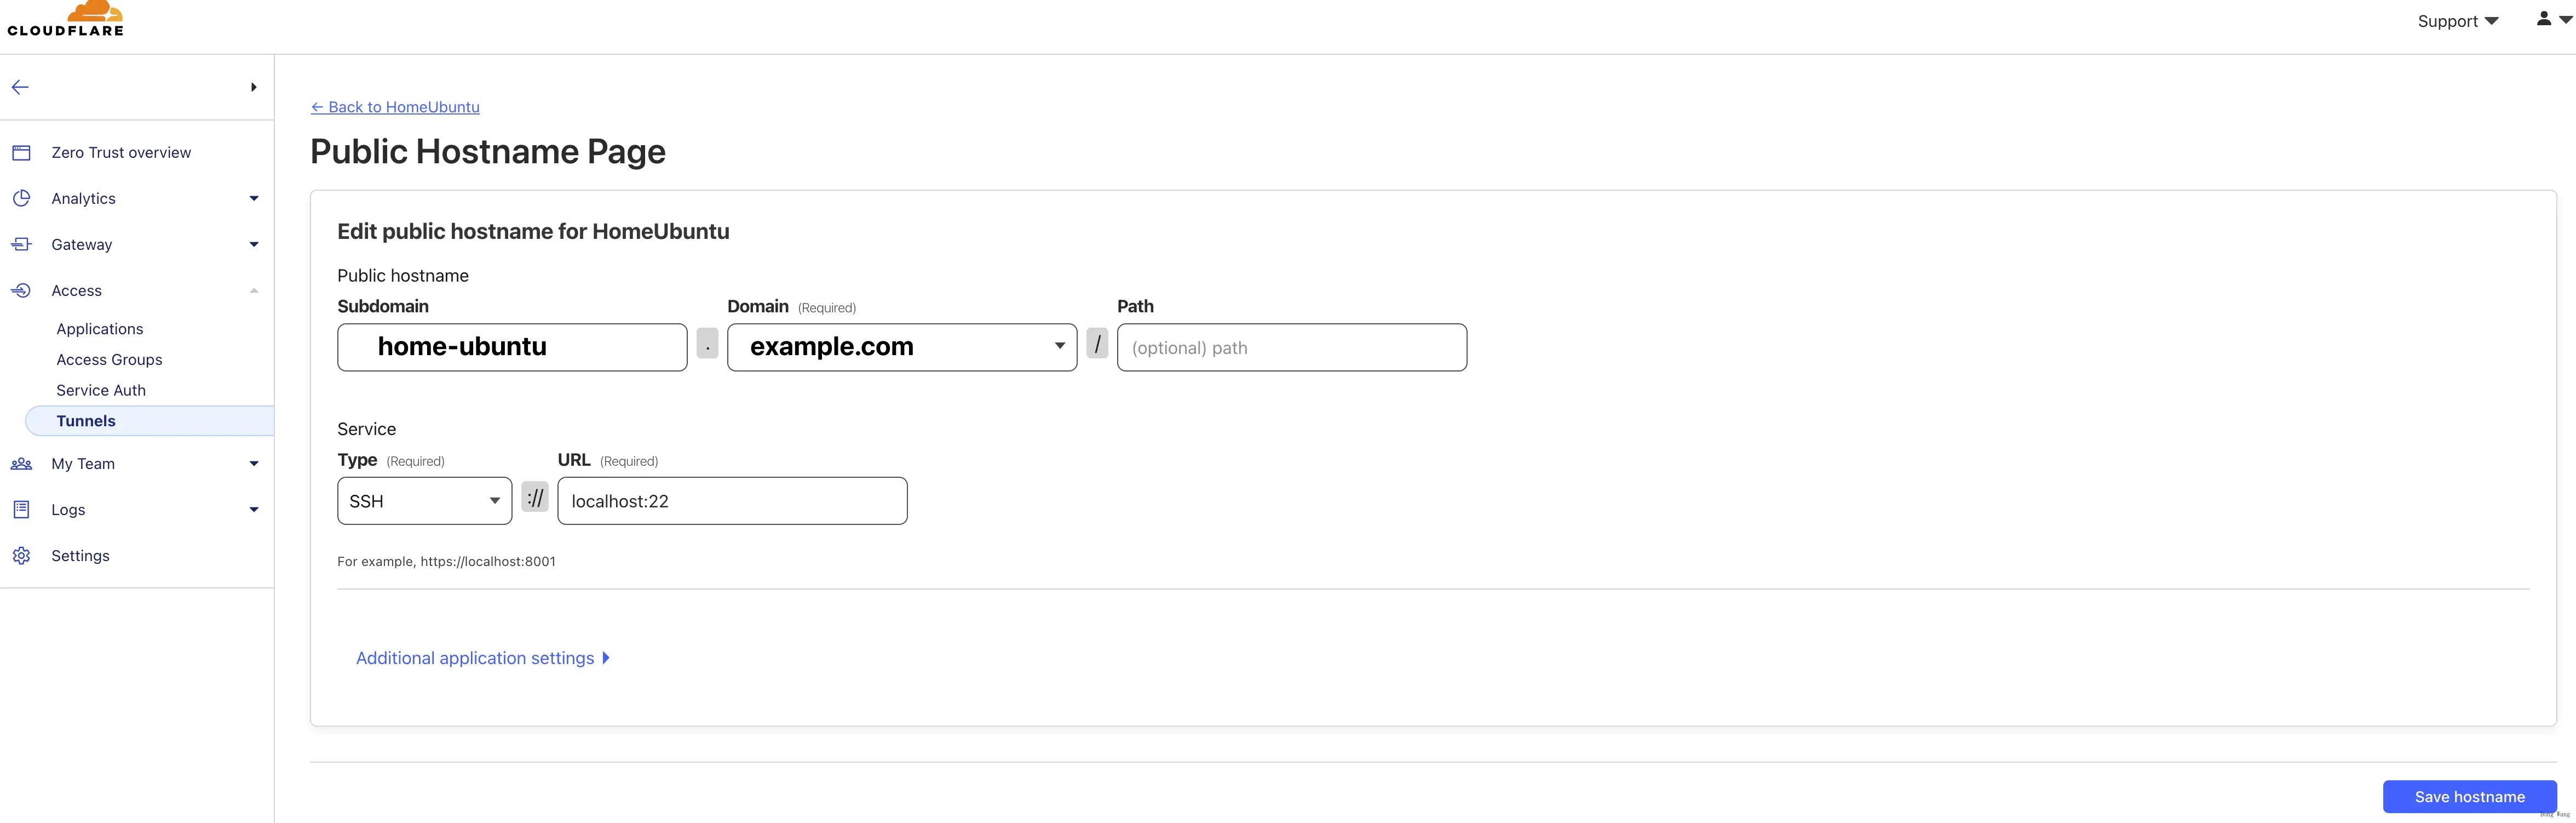
连接
如官方文档Connect as a user所示,请首先在你的电脑上安装 cloudflared。
然后配置 SSH, 比如 ~/.ssh/config
1 | Host home-ubuntu.example.com |
注意,这里主要的区别是多了 ProxyCommand /opt/homebrew/bin/cloudflared access ssh --hostname %h,以及Hostname 由 192.168.1.101变成了你在 Cloudflare 设置的 home-ubuntu.example.com。
参考
-EOF
查看最新版,请访问本文链接:https://blog.onehat.cn/p/cbe0.html
原创作品,转载请保留出处。